
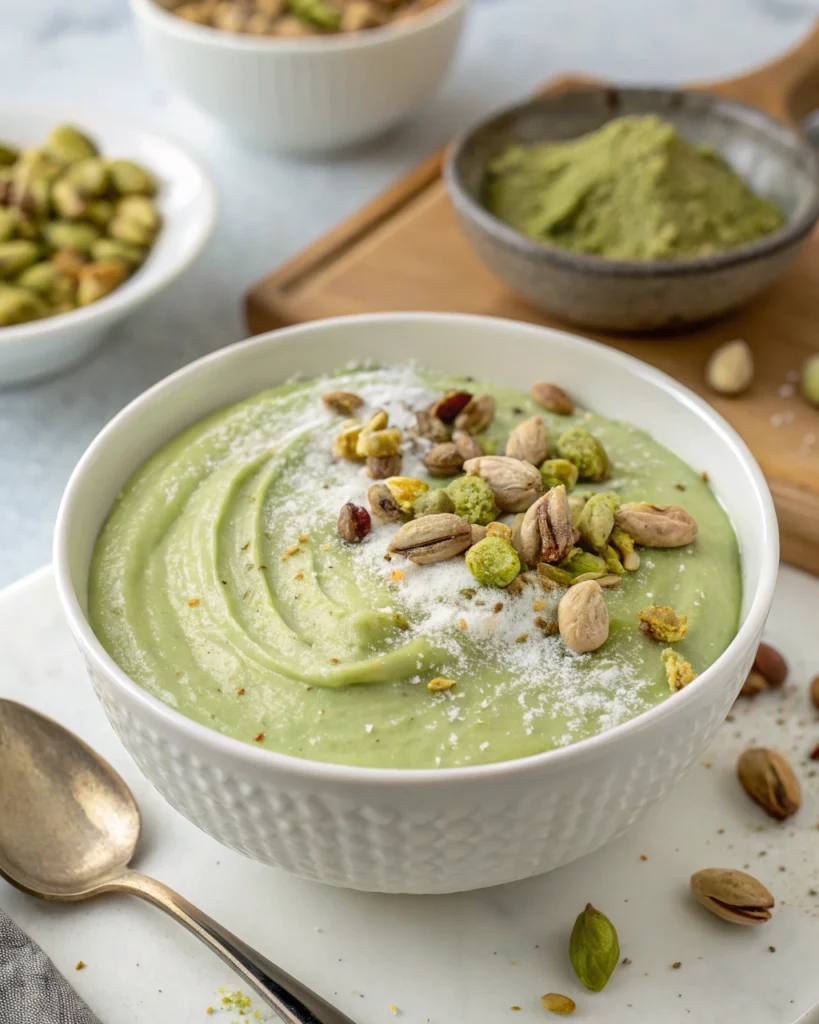
Hello there, fellow food lovers! Are you dreaming of a luscious, vibrant, and incredibly flavorful spread that instantly elevates desserts, pastries, or even your morning coffee? Imagine a spoonful of pure nutty bliss – smooth, rich, and bursting with the unmistakable taste of pistachios. If that sounds like heaven, then you’ve come to the right place! Today, we’re diving deep into creating the most delightful pistachio cream recipe right in your own kitchen.
Forget endlessly searching for “pistachio cream nearby” and often coming up empty or finding overly sweet, artificially colored versions. We’re crafting the real deal – a homemade pistachio cream that boasts an authentic flavor and a gorgeous, natural hue. What makes this particular pistachio cream recipe stand out? It’s built around a foolproof technique designed to give you silky smooth results every single time, even if you’re not a seasoned cook. It’s approachable, encouraging, and oh-so-rewarding.
Whether you’ve tasted exquisite versions like the famed Vincente pistachio cream and longed to recreate that magic, or you’re simply captivated by the allure of this unique nutty confection, this guide is for you. We’ll walk you through everything – from selecting the best nuts to achieving that perfect, velvety texture. Get ready to impress yourself (and anyone lucky enough to share!) with a pistachio cream recipe that’s destined to become a staple in your culinary repertoire. Let’s embark on this delicious journey together!
Why You’ll Absolutely Adore This Homemade Pistachio Cream Recipe
Before we roll up our sleeves, let’s talk about why making your own pistachio cream is such a wonderfully satisfying experience:
- Unbeatable Flavor: Nothing compares to the fresh, intense flavor of homemade. You control the quality of pistachios, the level of sweetness, and any subtle flavor enhancements. It’s pure, unadulterated pistachio goodness.
- Superior Texture: Our foolproof method focuses on achieving that coveted silky-smooth consistency. Say goodbye to grainy or separated creams!
- Ingredient Control: You know exactly what goes into your cream. No artificial colors, preservatives, or excessive sugars unless you choose to add them. This is especially important if you have dietary preferences or sensitivities.
- Incredible Versatility: As you’ll see, this pistachio cream isn’t just a one-trick pony. It’s a star player in countless desserts, breakfasts, and even drinks. We’ll explore plenty of serving suggestions later!
- The Satisfaction Factor: There’s a unique joy in creating something truly special from scratch. The aroma wafting from your kitchen, the vibrant green color, the first taste – it’s a rewarding process from start to finish.
- Cost-Effective: High-quality imported pistachio creams can be quite pricey. Making it at home, while requiring an initial investment in good pistachios, often proves more economical in the long run, especially if you fall in love with it (which we suspect you will!).
Understanding Pistachio Cream: More Than Just Nut Butter
It’s helpful to clarify what exactly we’re making. Pistachio cream, especially the luxurious Italian style (like crema di pistacchio), is distinct from simple pistachio butter.
- Pistachio Butter: Typically made from just ground pistachios, perhaps with a little salt or oil. It’s usually thick, intensely nutty, and less sweet, similar in concept to peanut butter.
- Pistachio Cream: This is a smoother, sweeter, and often richer concoction. It usually involves blending pistachio paste (finely ground pistachios) with sugar, some form of dairy or non-dairy liquid (like milk or cream), and often a fat (like butter or oil) to create a velvety, spreadable, or pourable cream. It’s designed more as a dessert component or luxurious spread.
This pistachio cream recipe focuses on the latter – a decadent, sweet cream perfect for indulgence.
Gathering Your Ingredients: The Foundation of Flavor
Precision is key in baking and confectionery. Using high-quality ingredients will make a significant difference in the final taste and texture of your pistachio cream. Here’s what you’ll need:
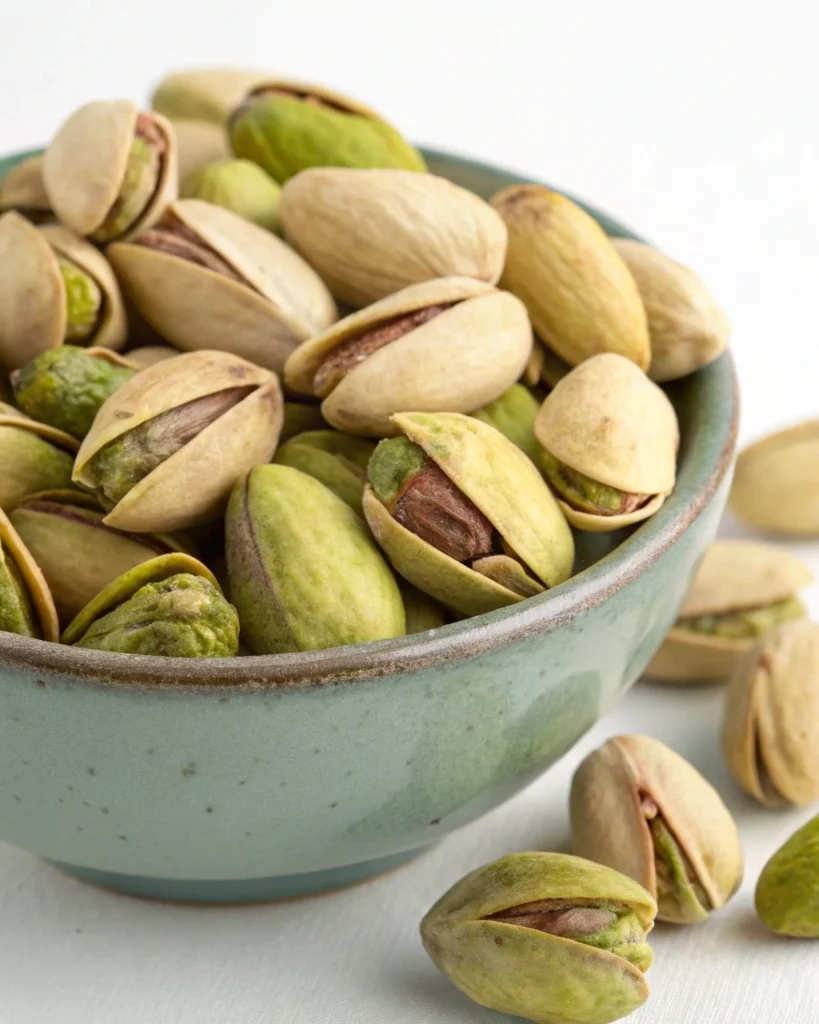
- 1 cup (about 150g) Raw, Unsalted, Shelled Pistachios: The star of the show!
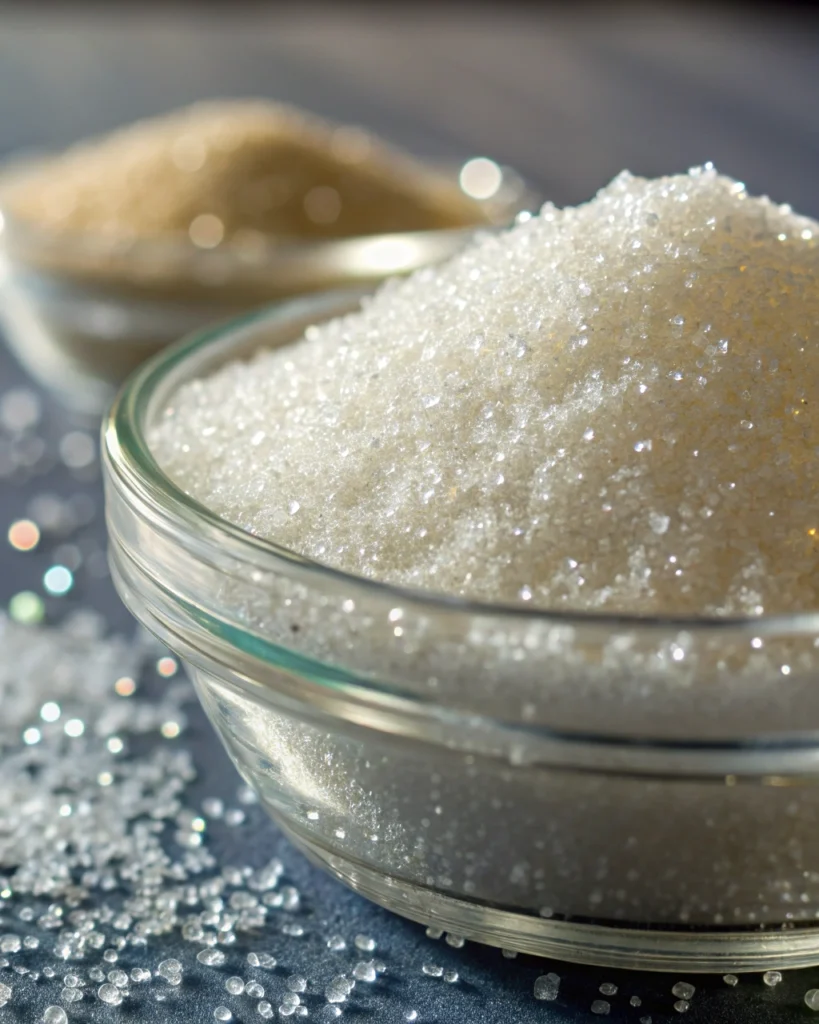
- ¾ cup (150g) Granulated Sugar: For sweetness and texture.
- ½ cup (120ml) Whole Milk: Provides liquid and richness. (See notes for substitutions)

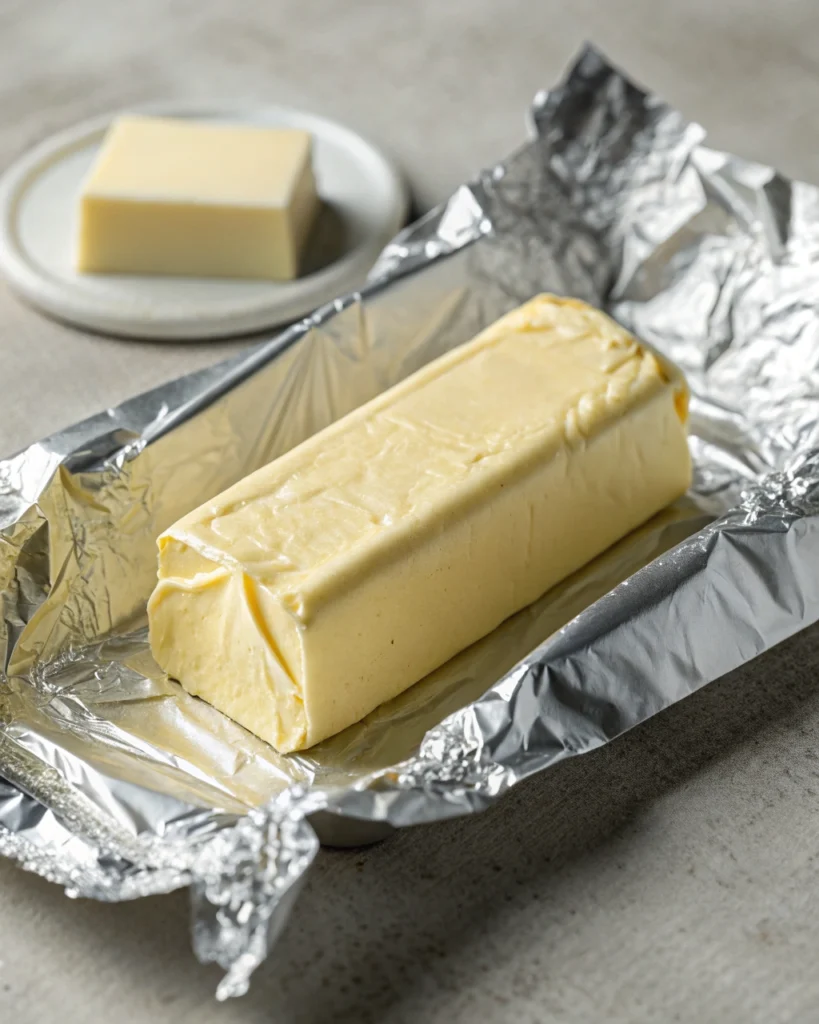
- ¼ cup (57g) Unsalted Butter, softened: Adds richness, smoothness, and helps with emulsification.
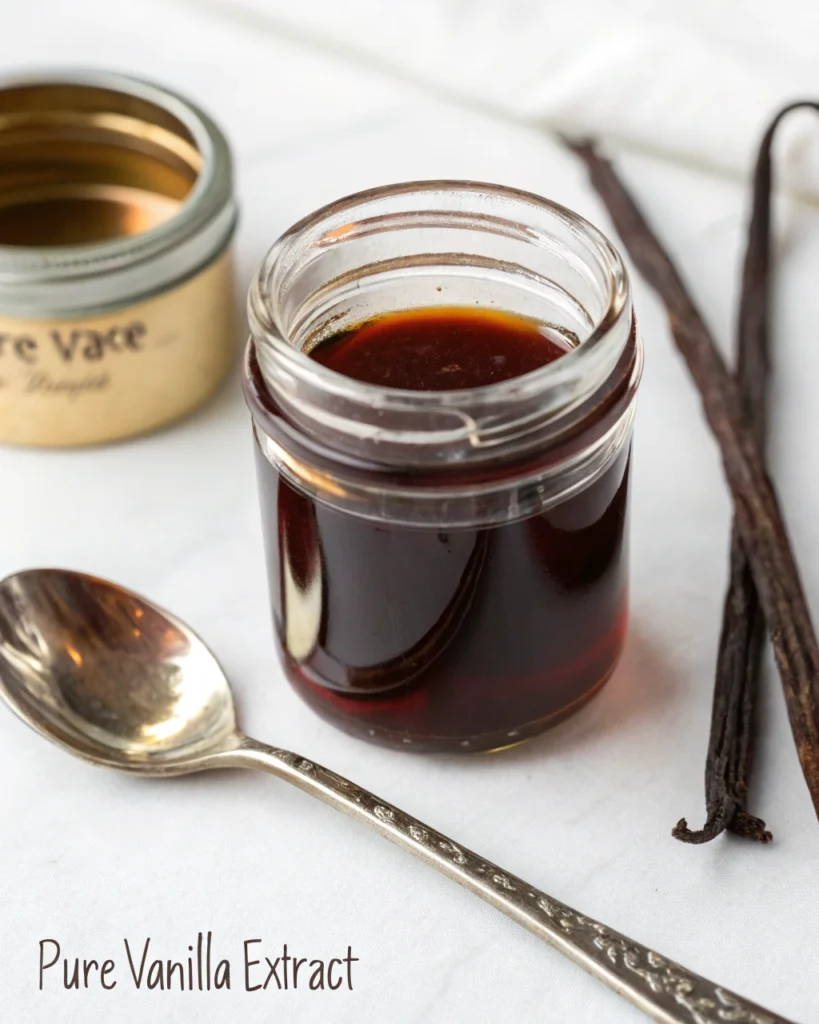
- 1 teaspoon Pure Vanilla Extract: Enhances the overall flavor profile.
- ⅛ teaspoon Salt: Balances the sweetness and elevates the pistachio flavor.
- Optional: 1-2 drops Natural Green Food Coloring: Purely for aesthetics if you desire a more vibrant green.
Detailed Ingredient Notes (and Why They Matter)
Pistachios:
- Quality: Seek out the best quality pistachios you can find. Look for bright green kernels; a vibrant color often indicates freshness and better flavor. Sicilian pistachios (like those from Bronte) are highly prized but can be expensive and harder to find. Good quality pistachios from California or other regions work beautifully too.
- Raw & Unsalted: Using raw pistachios allows you to control the roast (or lack thereof) and the salt content. Roasting brings out nuttiness but can slightly dull the green color. We’ll lightly toast them in this recipe for optimal flavor. Unsalted is crucial so you control the final seasoning.
- Shelled: Buying shelled pistachios saves you a significant amount of prep time and potential frustration! Ensure they are truly raw, not roasted and salted snack pistachios.
Granulated Sugar: Standard white granulated sugar works best here for a clean flavor and predictable texture. You can experiment with caster sugar (superfine sugar) for potentially quicker dissolving, but granulated is perfectly fine. We’ll discuss alternatives in the variations section.
Whole Milk: The fat content in whole milk contributes to a richer, creamier final product.
- Substitutions: You can substitute with 2% milk, but the cream might be slightly less rich. For a dairy-free version, unsweetened almond milk, soy milk, oat milk, or even full-fat coconut milk (which will add a coconut flavor) can be used, though texture might vary slightly. See the Variations section for more on vegan options. Heavy cream can also be used for an ultra-rich version, perhaps replacing half the milk.
Unsalted Butter: Butter adds flavor, richness, and crucial fat that helps create a smooth, stable emulsion. Using unsalted butter lets you control the saltiness precisely with the added salt.
- Substitutions: For a vegan version, high-quality vegan butter sticks or refined coconut oil (which has a neutral flavor) can be good substitutes. Ensure the vegan butter tastes good on its own.
Pure Vanilla Extract: Use pure vanilla extract, not imitation vanilla, for the best flavor. It beautifully complements the nutty pistachio taste without overpowering it. Almond extract is another classic pairing, but use it very sparingly (perhaps ¼ teaspoon) as it’s much stronger and can easily dominate.
Salt: A tiny pinch of salt works wonders in sweet recipes. It enhances the pistachio flavor and cuts through the richness, preventing the cream from tasting flat or overly sweet. Fine sea salt or regular table salt is fine.
Optional Food Coloring: Natural pistachio cream has a lovely, but often muted, green color, sometimes leaning towards brownish-green depending on the nuts and preparation. If you desire that bright, vibrant green often seen in commercial products, a tiny amount of natural green food coloring (derived from plant sources if possible) can be added. Use gel or powder, not liquid, to avoid adding extra moisture. Add it drop by drop until you reach the desired shade – less is definitely more here!
Essential Equipment for Pistachio Perfection
You don’t need highly specialized equipment, but a few key tools will make the process much smoother and yield better results:
- Food Processor or High-Speed Blender: This is the most crucial piece of equipment. A powerful machine is needed to break down the pistachios into a very fine, smooth paste. A high-speed blender (like a Vitamix or Blendtec) is ideal, but a good quality food processor will also work, though it might take longer and require more scraping down the sides.
- Small Saucepan: For heating the milk, sugar, and butter mixture. A heavy-bottomed saucepan helps prevent scorching.
- Heatproof Spatula or Wooden Spoon: For stirring the mixture in the saucepan and scraping down the sides of the blender/processor bowl.
- Fine-Mesh Sieve (Optional but Recommended): Straining the final cream through a fine sieve is an optional step but highly recommended for guaranteeing an ultra-silky, completely smooth texture, removing any tiny bits of pistachio skin or nut fragments that the blender might have missed.
- Airtight Storage Containers: For storing your finished pistachio cream. Glass jars work well.
- Baking Sheet: For lightly toasting the pistachios (optional step).
- Clean Kitchen Towel: Useful if you choose to blanch and peel the pistachios for a potentially brighter color (though our method doesn’t require it for ease).
How to Make Pistachio Cream: A Step-by-Step Guide (Our Foolproof Technique!)
Now for the exciting part! Follow these steps carefully, and you’ll be well on your way to pistachio cream heaven. This method prioritizes ease and reliable results.
Recipe Details:
- Prep Time: 20 minutes (includes toasting and blending time)
- Cook Time: 10-15 minutes
- Chill Time: At least 2 hours (essential for thickening)
- Total Time: Approximately 2 hours 35 minutes (including chilling)
- Servings: Makes approximately 1.5 cups (about 360ml)
- Difficulty Level: Medium (Requires attention to detail, but the steps are straightforward)
Step 1: Prepare the Pistachios (Toast for Flavor)
- Preheat Oven (Optional Toasting): Preheat your oven to 325°F (160°C). While some recipes use raw pistachios directly, a very light toasting significantly enhances their nutty flavor.
- Toast Nuts: Arrange raw, shelled pistachios in a single layer on an ungreased baking sheet. Toast in the preheated oven for 5-7 minutes. Keep a close eye on them! You want them to be fragrant and just starting to take on the slightest hint of color, but not browned. Over-roasting will diminish the green color and can make the nuts oily.
- Cool Completely: Remove the pistachios from the oven and let them cool completely on the baking sheet. This is important; blending warm nuts can make the paste oily and affect the final texture. Note on Blanching/Peeling: Some recipes call for blanching pistachios (boiling briefly then plunging in ice water) to make removing the thin purple skins easier, which can result in a slightly brighter green color. However, it adds significant time and effort. This foolproof method skips blanching for simplicity, and the flavor difference is minimal, while the light toasting adds depth.
Step 2: Create the Smooth Pistachio Paste
- Blend the Nuts: Place the completely cooled, toasted pistachios into the bowl of your high-speed blender or food processor.
- Initial Grind: Pulse the nuts a few times to break them down, then blend continuously. Initially, they will look like coarse crumbs.
- Scrape Down: Stop the machine frequently (especially with a food processor) and scrape down the sides and bottom of the bowl with your spatula. This ensures everything gets blended evenly.
- Keep Blending (Patience is Key!): Continue blending. The mixture will transform from crumbs to a thick, clumpy paste, and finally, as the oils release, it will become smoother and more fluid, resembling a thick nut butter. This process can take anywhere from 5 to 15 minutes, depending on the power of your machine. Be patient! You’re looking for the smoothest consistency possible. In a high-speed blender, this may happen faster. If your machine seems to be struggling or overheating, give it short breaks.
- Goal: The smoother the paste at this stage, the smoother your final cream will be.
Step 3: Prepare the Sweet Cream Base
- Combine Ingredients: In your small saucepan, combine the granulated sugar, whole milk, softened unsalted butter, and salt.
- Heat Gently: Set the saucepan over medium-low heat. Stir constantly with your spatula or wooden spoon, ensuring the sugar dissolves completely and the butter melts. Do not let the mixture boil vigorously. You just want it to heat through until steaming gently and the sugar is fully dissolved. This should take about 3-5 minutes.
- Check for Dissolved Sugar: Rub a little of the mixture between your fingers (be careful, it’s hot!) – it should feel smooth, not gritty. If you still feel sugar granules, continue heating and stirring gently for another minute or two.
- Remove from Heat: Once the sugar is dissolved and the mixture is hot, remove the saucepan from the heat.
Step 4: Combine and Emulsify
- Add Base to Paste: Carefully pour the hot milk mixture into the blender or food processor containing the smooth pistachio paste.
- Add Vanilla: Add the pure vanilla extract now.
- Blend Until Smooth: Secure the lid tightly (especially important when blending hot liquids – leave the vent open slightly and cover with a folded towel if using a blender). Start blending on a low speed, then gradually increase to medium-high. Blend for 1-2 minutes, or until the mixture is completely homogenous, smooth, and emulsified. It should look like a vibrant, albeit possibly thin, green cream. Scrape down the sides as needed to ensure everything is incorporated.
- Add Optional Color: If using, add 1-2 drops of natural green food coloring now and blend for another 10-15 seconds to incorporate evenly. Start with less – you can always add more, but you can’t take it away.
Step 5: Strain for Ultimate Silkiness (Optional but Recommended)
- Prepare Sieve: Place your fine-mesh sieve over a clean bowl or directly into your storage jar(s).
- Strain the Cream: Pour the warm pistachio cream through the sieve. Use your spatula to gently push the cream through the mesh. This will catch any tiny pieces of pistachio skin or nut fragments that didn’t fully break down, guaranteeing an exceptionally smooth texture. Discard any solids left in the sieve. This step elevates your pistachio cream recipe from great to exceptional.
Step 6: Cool and Chill (Crucial for Thickening!)
- Initial Cooling: Let the strained cream cool slightly at room temperature for about 20-30 minutes, stirring occasionally to prevent a skin from forming.
- Cover and Chill: Cover the bowl or jar(s) tightly. Pressing a piece of plastic wrap directly onto the surface of the cream can help prevent a skin from forming. Refrigerate for at least 2 hours, but preferably 4 hours or overnight.
- Thickening: The pistachio cream will thicken considerably as it chills. Don’t judge the final consistency while it’s still warm – chilling is essential!
Step 7: Serve and Enjoy!
- Stir Before Serving: Once fully chilled and thickened, give the pistachio cream a good stir before serving.
- Usage: Use as desired! Spread it on toast, scones, or croissants; dollop it onto pancakes or waffles; swirl it into yogurt or oatmeal; use it as a filling for cakes, macarons, or pastries; or simply enjoy a spoonful!
Expert Tips for the BEST Pistachio Cream Recipe
Want to ensure your pistachio cream is absolutely perfect? Here are some insider tips and tricks, expanding on the ‘why’ behind certain steps:
Pistachio Power – Quality is Paramount:
- Source: As mentioned, the better your pistachios, the better the cream. Avoid old or stale nuts, as they can taste bitter or rancid. Look for reputable brands or stores with good turnover.
- Freshness Check: Smell the pistachios before using them. They should have a fresh, nutty aroma. If they smell musty or off, don’t use them.
- Storage: Store unused raw pistachios in an airtight container in the refrigerator or freezer to maintain freshness, especially if you buy in bulk.
Blending Brilliance – The Path to Smoothness:
- Machine Matters: A high-speed blender truly excels here, creating the finest paste faster due to its power and vortex action. If using a food processor, be prepared for a longer blend time and more frequent scraping. Don’t give up too early – keep blending until it’s as smooth as your machine can possibly get it before adding the liquid.
- Temperature Control: Ensure the nuts are fully cooled after toasting before blending. Blending warm nuts releases oil too quickly, which can lead to a greasy texture or potential separation later.
- Don’t Add Liquid Too Soon: Resist the temptation to add liquid to help the nuts blend initially. Allow the nuts’ own oils to release and form the paste first. Adding liquid prematurely can hinder the grinding process.
Sweetness Savvy – Adjust to Your Taste:
- Baseline: This recipe provides a good level of sweetness, common for dessert creams. However, taste is subjective.
- Adjusting: If you prefer less sweetness, you can slightly reduce the sugar amount (e.g., start with ½ cup + 2 tablespoons / 125g) but be aware that sugar contributes not just sweetness but also texture and preservation. Drastically reducing it might affect the final consistency and shelf life.
- Alternative Sweeteners: Using liquid sweeteners like maple syrup or agave nectar is possible but will alter the flavor and potentially make the cream thinner (you might need to slightly reduce the milk). Their hygroscopic nature might also affect shelf life. Start with small substitutions if experimenting.
Creamy Consistency – Nailing the Texture:
- Don’t Undercook the Base: Ensure the sugar is fully dissolved in the milk/butter mixture. Undissolved sugar can lead to a grainy texture. Gentle heating is key.
- Don’t Overcook/Boil: Boiling the milk mixture, especially for too long, can cause it to reduce too much, potentially making the final cream too thick once chilled or causing proteins to denature oddly. Gentle heating is sufficient.
- Trust the Chill: The cream will seem quite thin when warm, especially after blending. Resist adding thickeners. The chilling process is where the magic happens as the fats solidify and the mixture sets. Allow adequate chilling time (minimum 2 hours, ideally longer).
- Troubleshooting Thickness: If, after thorough chilling, it’s still much thinner than desired (unlikely with this ratio if steps were followed), you could gently reheat it and simmer very briefly (stirring constantly), but this risks scorching. If it’s too thick, you can stir in a tiny bit more milk (a teaspoon at a time) until it reaches your desired consistency.
Color Considerations – Embrace the Natural Hue:
- Natural Variation: The final color depends heavily on the specific pistachios used. Some yield a brighter green, others a more muted olive or brownish tone. This is natural!
- Toasting Impact: Light toasting enhances flavor but can slightly mute the brightest green tones.
- Blanching (Optional): As noted, blanching and peeling can yield a brighter green but adds significant work. This recipe skips it for ease.
- Food Coloring: If using, be extremely conservative. Aim for enhancing the natural color, not creating an artificial neon green. Natural food colorings (like spirulina or matcha powder – though matcha adds flavor) are options but use sparingly. Gel colors provide vibrancy without extra liquid.
Flavor Finesse – Enhancing the Star:
- Vanilla & Salt: Don’t skip the vanilla and salt. They are crucial supporting actors that make the pistachio flavor shine.
- Almond Extract: A classic pairing, but potent. If using, start with just ¼ teaspoon alongside or instead of vanilla. Too much will taste artificial.
- Other Enhancements: A hint of rosewater (start with ¼ tsp) or orange blossom water offers a Middle Eastern flair. A tiny pinch of cardamom works well too. Add these at the end with the vanilla.
Patience Pays Off – Let it Meld:
- Blending Time: Don’t rush the pistachio paste stage. Longer blending equals smoother cream.
- Chilling Time: Absolutely essential. The flavors meld and the texture sets during chilling. Overnight chilling often yields the best results.
Storage Smarts – Keep it Fresh:
- Airtight Container: Store in a clean, airtight container (glass jars are ideal) in the refrigerator.
- Surface Contact: Pressing plastic wrap directly onto the surface before lidding helps prevent oxidation and skin formation.
- Shelf Life: Properly stored, homemade pistachio cream should last for about 1-2 weeks in the refrigerator. Observe for any signs of spoilage (off smell, mold) before consuming. See FAQs for freezing info.
Recipe Variations: Get Creative!
This pistachio cream recipe is fantastic as is, but it’s also a wonderful base for experimentation!
Pistachio Coffee Creamer Adaptation:
(Addressing Keyword: “pistachio creamer”, “pistachio coffee creamer”)
- The Challenge: This recipe creates a thick, spreadable cream. For coffee, you need something more fluid.
- How to Adapt: Make the base recipe as directed. Once chilled and thickened, whisk in additional liquid until it reaches a pourable creamer consistency. Start with a few tablespoons of whole milk, half-and-half, or your favorite non-dairy milk (like oat or almond). Whisk until smooth. Taste and adjust sweetness if needed (you might want it slightly less sweet for coffee). Store this adapted pistachio coffee creamer in the fridge and shake well before use. Note: Natural separation might occur upon sitting; just stir it back together. It won’t be exactly like commercial creamers (which often contain emulsifiers and stabilizers), but it will be delicious!
Vegan/Dairy-Free Pistachio Cream:
- Milk: Replace the whole milk with a good quality, neutral-flavored, unsweetened plant-based milk. Creamy oat milk or cashew milk works well. Full-fat canned coconut milk can be used for extra richness, but be aware it will impart a coconut flavor.
- Butter: Substitute the dairy butter with an equal amount of high-quality vegan butter sticks (look for ones with good flavor) or refined coconut oil (which is flavorless).
- Method: Follow the recipe steps exactly as written, using your chosen substitutions. The chilling time is still crucial.
- Lower Sugar Option:
Reduce the granulated sugar to ½ cup (100g). The cream will be noticeably less sweet and potentially slightly less thick. Taste the warm mixture (carefully!) before chilling and decide if the sweetness level is right for you. Further reduction might compromise texture and shelf life significantly.
Flavor Twists:
- Rose Pistachio: Add ¼ to ½ teaspoon of rosewater along with the vanilla extract. Garnish with edible dried rose petals.
- Cardamom Pistachio: Add ¼ teaspoon of ground cardamom to the milk mixture while it heats.
- Citrus Kiss: Add ½ teaspoon of finely grated orange or lemon zest to the finished cream after blending. Be sure to use only the colored part, not the bitter white pith.
- White Chocolate Pistachio: Melt 2-3 ounces (60-85g) of good quality white chocolate separately. Once the pistachio cream is blended but still warm (before straining), blend in the melted white chocolate until fully incorporated. This will make the cream richer and sweeter. Chill as directed.
- Ultra-Rich Version: Replace half of the whole milk (¼ cup / 60ml) with heavy cream. This will result in an even more decadent, richer pistachio cream.
Serving Suggestions: Beyond the Spoon
The possibilities for using your glorious homemade pistachio cream are nearly endless! Here are just a few ideas to get you started:
Breakfast & Brunch Star:
- Spread generously on toast, croissants, brioche, or scones.
- Dollop onto pancakes, waffles, or French toast instead of syrup.
- Swirl into bowls of oatmeal, Greek yogurt, or chia pudding.
- Serve alongside fresh fruit platters.
Dessert Fillings & Layers:
- Use as a filling between layers of sponge cake or white cake.
- Fill macarons, cream puffs (profiteroles), cannoli shells, or éclairs.
- Layer in trifles or parfaits with cake crumbles, berries, and whipped cream.
- Spread inside crepes before rolling them up.
Toppings & Garnishes:
- Top cupcakes or cheesecakes (especially good on plain cheesecake!).
- Dollop onto fruit tarts or pavlova.
- Serve warm or cold alongside lava cakes or brownies.
- A spoonful on top of a simple bowl of vanilla or chocolate ice cream is divine.
Drinks:
- Use the adapted pistachio coffee creamer version (see Variations) in hot or iced coffee.
- Blend a spoonful into milkshakes or smoothies for a nutty boost.
- Simple Indulgence: Enjoy it straight from the spoon! (We won’t judge!)
Troubleshooting Common Pistachio Cream Issues
Even with a foolproof technique, sometimes things don’t go exactly as planned. Here’s how to tackle common issues:
Issue: Cream is too thin, even after chilling.
Cause: Possibly not chilled long enough; milk mixture might have been too watery (incorrect measurement or low-fat milk used); ratio slightly off.
Fix: Ensure it has chilled for at least 4 hours or overnight. If still too thin for your liking, you can try gently reheating the cream in the saucepan over very low heat, stirring constantly, until it thickens slightly more (simmer very gently for a few minutes). Be extremely careful not to scorch it. Cool and chill thoroughly again. Alternatively, embrace its consistency and use it as a sauce or drizzle.
- Issue: Cream is too thick or solid after chilling.
Cause: Cooked the milk mixture too long, reducing it too much; used heavy cream instead of milk without adjusting; ratio slightly off.Fix: Let the cream sit at room temperature for 15-20 minutes to soften slightly. Stir vigorously. If still too thick, stir in a tiny amount (1 teaspoon at a time) of milk or cream until it reaches your desired consistency.
- Issue: Cream is grainy or not perfectly smooth.
Cause: Pistachios weren’t blended into a smooth enough paste initially; sugar didn’t fully dissolve in the milk mixture; cream wasn’t strained.Fix: If it’s only slightly grainy, straining (even after chilling, though it will be thicker) might help. If the graininess is from undissolved sugar, gently reheating might help dissolve it, but risks scorching. Prevention is key here: blend the nuts thoroughly and ensure sugar is dissolved. Using the optional straining step is the best insurance against graininess.
- Issue: Cream separated (oil pooling on top).
Cause: Often happens if nuts were blended while warm, releasing too much oil too quickly; over-blending after adding the hot liquid; significant temperature fluctuations during storage.Fix: Usually, a vigorous stir will re-emulsify the cream. If separation is persistent, you can try gently warming a small portion of the cream and then vigorously whisking it back into the rest. Storing at a consistent, cold refrigerator temperature helps prevent this.
- Issue: Color isn’t vibrant green.
Cause: This is usually natural! The type of pistachios, degree of toasting, and lack of artificial coloring all contribute.
Fix: Embrace the natural color! It signifies authenticity. If you absolutely desire a brighter green next time, source very high-quality, bright green pistachios, consider the optional (and laborious) blanching/peeling step, toast very minimally or not at all (sacrificing some flavor depth), or use a tiny drop of natural green food coloring as described in the recipe.
- Issue: Taste is bland or not “pistachio-y” enough.
Cause: Pistachios used were old or low quality; needed more salt or vanilla to enhance flavor.Fix: Ensure you’re using fresh, high-quality pistachios – this is the biggest factor. Double-check that you added the salt and vanilla, as they amplify the nuttiness. For the next batch, slightly increase the amount of pistachios relative to the other ingredients if desired, though this will make it richer and potentially thicker.
Nutritional Information (Estimate)
Please note that these values are estimates calculated using standard nutritional databases. Actual values may vary based on specific ingredients used (especially the type of milk and the exact fat content of pistachios). This estimate is per tablespoon (approx. 15g serving).
- Calories: approx. 60-75 kcal
- Fat: approx. 4-6g
- Saturated Fat: approx. 1-2g
- Carbohydrates: approx. 5-7g
- Sugars: approx. 4-6g
- Protein: approx. 1-1.5g
- Sodium: approx. 10-15mg (will vary based on salt added)
This cream is a treat, best enjoyed in moderation as part of a balanced diet. The primary components are healthy fats from pistachios and butter/oil, along with sugars.
Frequently Asked Questions (FAQs) about Pistachio Cream
Here are answers to some common questions about making and storing this delightful pistachio cream recipe:
- How long does homemade pistachio cream last?
When stored properly in an airtight container in the coldest part of your refrigerator, homemade pistachio cream should stay fresh for 1 to 2 weeks. Always check for any signs of spoilage (off smell, mold, significant separation that won’t stir back in) before consuming. Use a clean utensil each time you dip into the jar to prevent contamination.
- Can I use roasted and salted pistachios?
It’s not recommended for this recipe. Roasted pistachios can have a slightly different flavor profile (less fresh, more deeply nutty) and may result in a duller color. More importantly, salted pistachios make it impossible to control the final saltiness of the cream, likely resulting in a product that’s too salty. Starting with raw, unsalted pistachios gives you the most control and best flavor balance for this sweet cream.
- Can I make this pistachio cream recipe vegan/dairy-free?
Yes! As detailed in the Variations section, substitute the whole milk with a creamy, unsweetened plant-based milk (like oat, cashew, or soy) and replace the dairy butter with high-quality vegan butter sticks or refined coconut oil. Follow the instructions as written.
- Why isn’t my pistachio cream bright, artificial green like some store-bought versions?
The beautiful, often muted green color of this homemade cream is natural! It comes directly from the chlorophyll in the pistachios. Commercial products often use artificial green food coloring (like Blue No. 1 and Yellow No. 5) to achieve a consistently vibrant, almost neon hue. Toasting the nuts can also slightly deepen the color. Embrace the authentic shade – it’s a sign of a natural, homemade product! You can add a tiny touch of natural green food coloring if desired, but the flavor is paramount.
- Is this the same as Vincente pistachio cream or other Italian pistachio creams?
(Addressing Keyword: “vincente pistachio cream”) This homemade pistachio cream recipe aims to capture the luxurious texture and delicious flavor profile often associated with high-quality Italian pistachio creams like the renowned Vincente brand from Bronte, Sicily. While it’s inspired by that style (sweet, creamy, intensely pistachio-flavored), it’s not an exact replica of any specific commercial recipe (which are often proprietary secrets!). However, making it at home allows you to use high-quality ingredients and achieve a result that many find rivals or even surpasses store-bought versions in freshness and authentic taste, without potentially searching for “pistachio cream nearby” and being disappointed.
- Can I use this recipe directly as a pistachio coffee creamer?
(Addressing Keyword: “pistachio coffee creamer”, “pistachio creamer”) As written, this recipe produces a thick cream, more like a spread or filling. To use it effectively in coffee, you’ll need to thin it down. Follow the adaptation instructions in the Variations section by whisking in additional milk (dairy or non-dairy) until it reaches a pourable consistency suitable for a pistachio coffee creamer. Remember to shake well before each use.
- My cream separated in the fridge. Can I fix it?
Yes, usually. Separation (a little oil on top) can happen, especially with natural nut products without stabilizers. Simply stir the cream vigorously with a spoon or small whisk until it comes back together. Storing it consistently cold helps minimize this.
- Can I freeze homemade pistachio cream?
You can freeze it, but the texture may change upon thawing. Freezing can sometimes cause dairy or fat emulsions to break or become slightly grainy or watery. If you choose to freeze it, store it in an airtight, freezer-safe container, leaving a little headspace for expansion. Thaw it slowly in the refrigerator overnight. Once thawed, stir it very well. It might not be exactly the same super-smooth texture as when fresh, but it should still be usable, especially in applications where it will be heated or mixed with other ingredients. For best results, enjoy it fresh within 1-2 weeks.
Conclusion: Your Homemade Pistachio Cream Journey Awaits!
And there you have it – everything you need to create an absolutely stunning, smooth, and incredibly delicious homemade pistachio cream recipe! We’ve walked through selecting the best ingredients, mastering the foolproof technique for blending and cooking, explored tips for success, and discovered countless ways to enjoy your creation.
Making this pistachio cream isn’t just about following steps; it’s about embracing the process, enjoying the aromas, and anticipating that first glorious taste. It’s a little bit of kitchen magic that transforms humble nuts into a luxurious treat. The versatility of this cream means you can add a touch of gourmet elegance to simple breakfasts, everyday snacks, or show-stopping desserts. Forget the fruitless search for “pistachio cream nearby” – the very best version is waiting to be made in your kitchen.
We truly hope you feel confident and excited to try this pistachio cream recipe. It’s a rewarding endeavor that yields spectacular results.
Now it’s your turn!
- Leave a comment below: Did you make the recipe? Do you have any questions? Share your experience – we love hearing from you! What’s your favorite way to use pistachio cream?
- Share the love: If you enjoyed this recipe, please consider sharing it with your friends and family on Pinterest or Facebook! A quick share helps others discover this deliciousness too.
- Stay connected: Want more foolproof recipes, cooking tips, and culinary inspiration delivered straight to your inbox? Sign up for our newsletter! You’ll be the first to know about new posts and exclusive content.
Happy Cooking! We know you’re going to love this pistachio cream as much as we do.